Welcome back! Here's Part 2 of the Sew Along.
We are doing the bodice today.
Step 1: The ties. Iron the two ties flat
Fold the ties in half with the right side facing in.
Step 2: Pin and sew along one edge and the long side, for both ties.
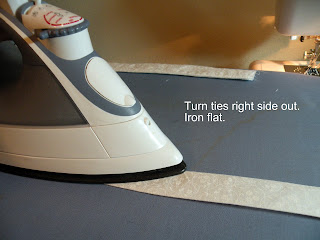
Step 3. Turn the ties right side out
Step 4: Iron the ties flat.
Step 6: take the back bodice pieces and back lining pieces and lay them facing eachother.
Step 7 place the elastic in a loop along the edge of one side of the back bodice.
Step 8: Pin lining to bodice outsides facing each other.
Step 9: Sew along side neck and shoulder. do not sew arm holes
Do this for both back pieces. on the side with the elastic loop make sure you caught it by going over it twice.
Step 10: flip lining to the back side and iron flat.
Step 11: Face both back sides together and pin. Sew to just above the edge of the lining.
Step 12: Sew front lining to Front bodice the same as you did in the back, only sewing the shoulders and neck, not the arm holes or the sides.
Step 13: Pin a square right in the middle.
Step 14: Sew just inside of the pins to make a square.
Step 15: Cut a square along the new seam.
Step 16: Lay back on front outsides facing in. Pin ties to the side seam.
Step 17: Pin sides and shoulders. Sew Sides and Shoulders.
Step 18: Use the covered button kit to make your button.
Using the pattern on the back of the package cut your fabric for the button.
Place the fabric and button front in the mold. Push the fabric into the center of the button.
Place the back in the middle. Use the plunger to push the back into the button and make it stick.
Step 19: Sew button on back of bodice.
Your bodice is now finished.
Tomorrow we will put the skirt together.
Again if you have any questions let me know.


No comments:
Post a Comment