

I did Tabitha's in a size 4t, she's kind of in-between a 3t and 4t right now, and I wanted to be able to put sweaters under it to keep her warm if I need to. I also made the hem 1 inch folded twice, so that I could let it down if I need to. She is growing up not out, so having a hem I could let down is really helpful.
Supplies:
Enough Fabric for the dress and lining. I used 1 yard of outer fabric and 1/2 yard red fabric for the lining.
buttons
Ruler
scissors
cutting mat and rotary cutter if you have them.

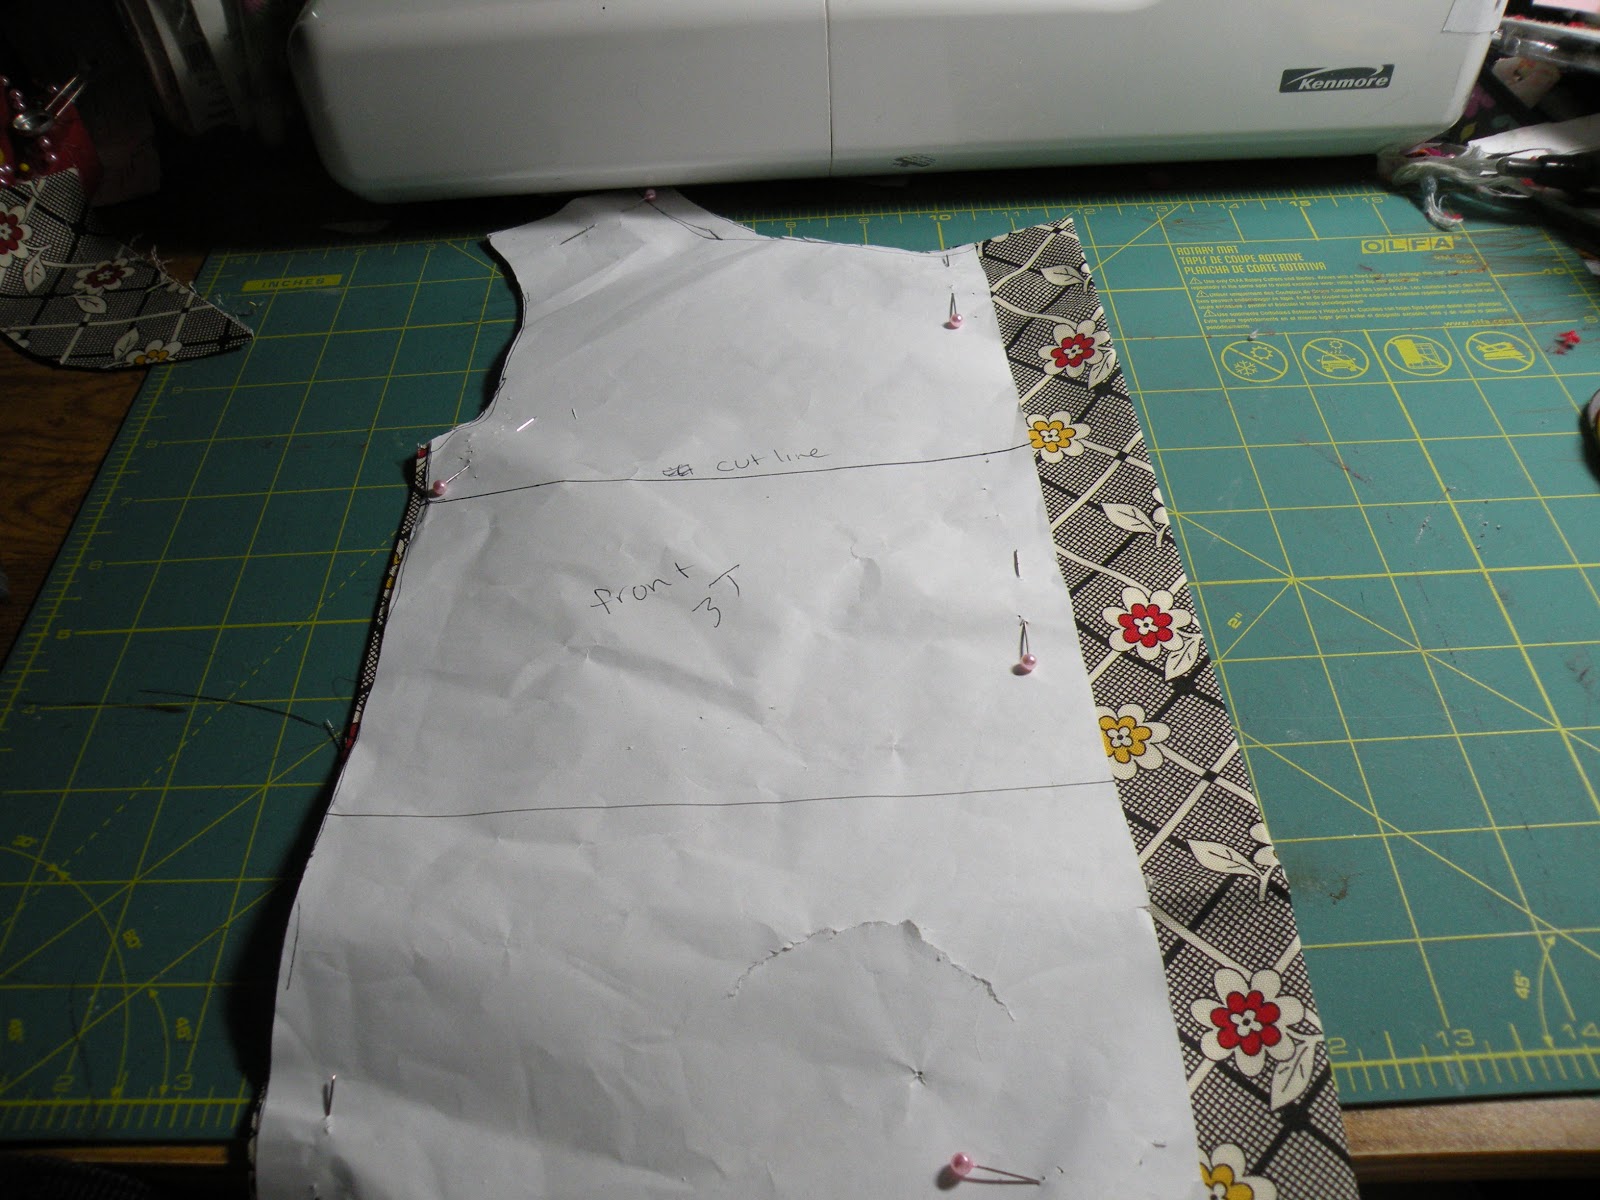
make sure you have your Basic top pattern ready and cut out.
Don't mind the extra markings on mine, thats from a different dress.

1. Line up the pattern 1 inch from the edge of the fabric.
2. Cut 2 of the front leaving 1 inch extra out front. This will be for the button holes.

3. Cut the back on the fold. Do not add and extra fabric for the back (sorry no picture of just the back)

4. Lining. lay the pattern on the folded in half lining material. Pin leaving 1 inch (sorry bad angle of picture)
5. Cut back lining same as back fabric. On fold no extra material.

6. Pin and sew front to back at shoulders and side seams for both main and lining fabric.
7. Place lining fabric on main fabric top side together.
8. Pin main fabric to lining fabric at neck, armhole and front where buttons will be.

9. Sew main fabric to lining,

10. Turn right side out and press seams.

11. Fold one side of the front over 1 inch. Pin down

12. Sew down fold to keep it in place.

13. Decide where you want your buttons and using your machine's buttonholer add your button holes along the front.

14. Line up the two sides and sew the bottom of the front closed.

15. For the skirt, I cut a rectangle, the entire width of the fabric by 15 inches long. You will need to decide how long you want the dress. If you want to be able to let it down as your child grows, add 2 inches to the final length you want. I not add 1 inch and you will do a half inch seam.

16. Sew the rectangle into a tube at the selvage.

18. Line up the skirt seam with the middle of the back of the dress.

19. Then distribute the skirt evenly to the front and sides and pin.

20. Add pleats by folding over and pining. It depends on how much fabric you have and how close you want your pleates. I did four pleats in each section.

21. Sew your pleats.
(after this I don't have step by step pictures, sorry.)
22. Sew on the buttons to the front of the dress.
23. Hem your dress. For a dress you want to let it out later, fold up the hem 1 inch press, then fold it up another inch, press and sew it down. For a hem that you will leave, fold up the hem 1/2 inch, press, fold another 1/2 inch, press and sew.
Thats it. The dress took me about 2 hours to make not including the buttons because I did those in the morning.
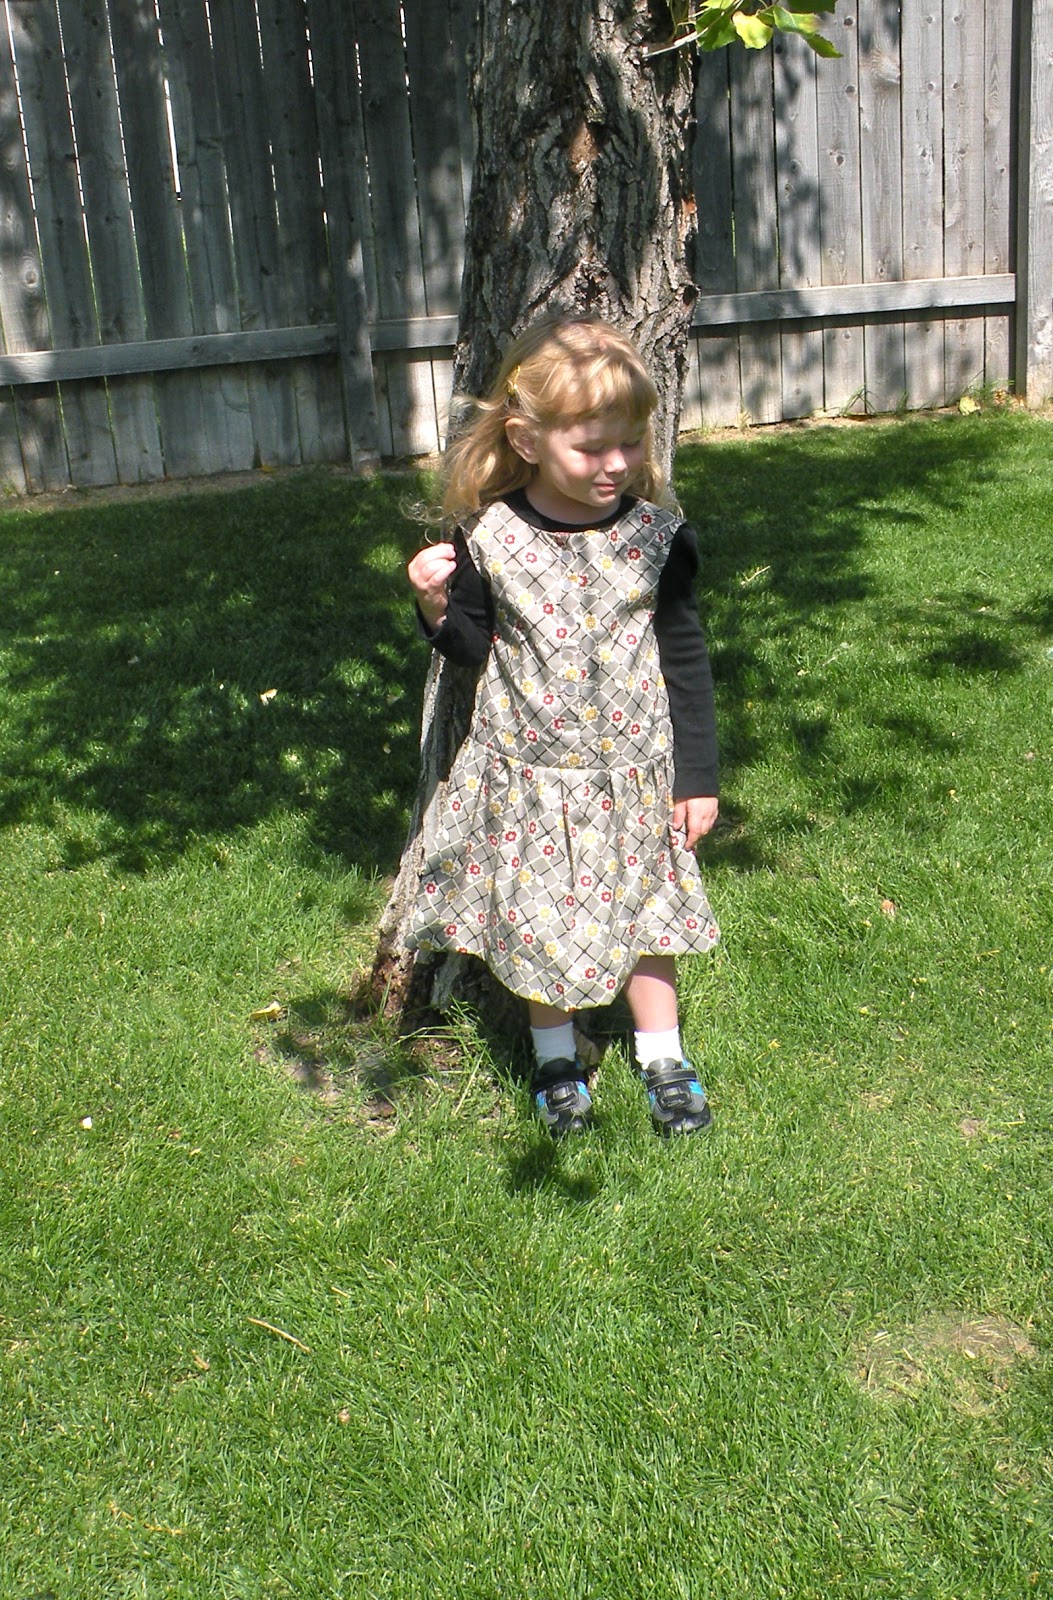


I hope you enjoy the Penny Jumper, and if you have any questions feel free to ask, I'll answer as quick as I can.
Teresa
2 comments:
I absolutely love this dress style! Thanks so much for the tutorial!
I love this!! Pinned for future reference, I so hope I have a girl one day! So many beautiful little things to sew here :o)
Post a Comment